

Note: This post has affiliate links, which means that if you purchase something from that website, I will receive a small fee.
Remember I told you about my fear of fondant?
If someone had only told me that it was
just like playing with Play-Doh,
I would have tried it a lot sooner.
just like playing with Play-Doh,
I would have tried it a lot sooner.
The cake decorating class on my cruise was so much fun,
I had to try working with fondant on my own.
I decided to tackle my first project
for my sister's birthday,
which we celebrated on Mother's Day.

I made the cake the day before,
just in case it was an epic fail.
That way, I still had time to run out
and buy something on Sunday morning if I had to.
and buy something on Sunday morning if I had to.
To my surprise and amazement,

I was a little nervous about prepping the layer cake
so that it would be level and smooth...
so that it would be level and smooth...
and rolling out my own fondant...
But guess what?
It was easy!

I'll take you through it step-by-step,
so you can see how simple it is.
The hard part is coming up with a creative design.
I opted to forego that this time,
and copy the design from the fondant kit I bought.
The class on the cruise ship was sponsored by the Cake Boss.
I happened to find this kit in a local store,
but it's available on Amazon, too.
It comes with fondant cutters in different shapes and sizes
that create two different flower cakes.
It also had pastry bags and tips that I didn't use for this cake.
Separately, I purchased the fondant smoother,
white fondant for the background (24 oz.),
and a package (17.6 oz.) of colored fondants for the flowers.

Ready?
1. Bake your favorite layer cake.
1. Bake your favorite layer cake.
I used the recipe from my Best Chocolate Cupcakes Ever.
Instead of putting the batter into muffin tins,
I spread it evenly between two 9-inch cake pans.
2. After the cakes cool completely,
place the first layer on a cake plate
(the one you will be serving it on),
trying to center it to the plate.
trying to center it to the plate.
I was not too successful!
3. Very carefully, slice off the very top,
so that the cake is flat.
Man, that is one Ugly Picture.
Man, that is one Ugly Picture.

4. Spread the icing on top of the bottom layer.
Leave around a half-inch from the edge of the cake.
Don't tell anyone, but I did not make my own frosting
for in between the layers.

for in between the layers.
I just didn't have the time.
5. Place the second layer on top.
Slice off the top so that it is flat.
This is really important,
so that the fondant doesn't look like a mountain with moguls.

This is really important,
so that the fondant doesn't look like a mountain with moguls.
6. Apply a thin layer of "Dirty Icing."
Now, don't go mixing your dust-bunnies into the icing...
Dirty Icing is just another term for a thin coat of buttercream
that keeps the crumbs from coming through.
I used canned white buttercream, by the way.
Use an icing spatula to carefully cover the entire cake.
You can see how all of the crumbs are trapped.
7. Refrigerate the cake for at least 30 minutes,
or until the icing has hardened.
Grab yourself a cocktail,
or go get your nails done.
8. Roll the fondant.
Now comes the fun part.
You will need a large area to roll the fondant.
I rolled mine right on the counter
since I didn't have anything else that was big enough.
Sprinkle confectioner's sugar onto your surface.
Measure the diameter of the cake.
My cake was 9 inches.
Measure the height, and multiply by two.
Mine was 4 inches x 2, is 8.
That's 17 inches.
Then add another 3-4 inches.
My fondant had to be rolled to about 20-21 inches to fit the cake.
Got that?
As you are rolling, peel the fondant off the
surface periodically to keep it from sticking.

9. Drape the fondant over the cake.
I lifted the fondant with my hands,
but it would have been better if
I used the rolling pin instead of my arm to transport it.
No biggie, though. It worked.

10. Smooth the top of the cake.
Even if it looks smooth, don't skip this step
because this will also get the fondant
to adhere to the cake.
Using the smoother, start in the middle,
working out to the edges.
Don't use your hands, or you might have
hand prints on your cake.
Unless, uh, that's part of your design.

11. Press the sides of the fondant to the cake.

12. Trim the fondant from the base of the cake.
Use a pizza cutter or a sharp knife.
You can also buy a fondant cutter.

The hard part is done!
You're almost there...

13. Cut out shapes using fondant cutters,
or until the icing has hardened.
Grab yourself a cocktail,
or go get your nails done.
8. Roll the fondant.
Now comes the fun part.
You will need a large area to roll the fondant.
I rolled mine right on the counter
since I didn't have anything else that was big enough.
Sprinkle confectioner's sugar onto your surface.
Measure the diameter of the cake.
My cake was 9 inches.
Measure the height, and multiply by two.
Mine was 4 inches x 2, is 8.
That's 17 inches.
Then add another 3-4 inches.
My fondant had to be rolled to about 20-21 inches to fit the cake.
Got that?
As you are rolling, peel the fondant off the
surface periodically to keep it from sticking.
9. Drape the fondant over the cake.
I lifted the fondant with my hands,
but it would have been better if
I used the rolling pin instead of my arm to transport it.
No biggie, though. It worked.
10. Smooth the top of the cake.
Even if it looks smooth, don't skip this step
because this will also get the fondant
to adhere to the cake.
Using the smoother, start in the middle,
working out to the edges.
Don't use your hands, or you might have
hand prints on your cake.
Unless, uh, that's part of your design.
11. Press the sides of the fondant to the cake.
Work carefully to avoid any folds, or bubbles,
along the sides.
Use the base of the smoother to work the sides.
12. Trim the fondant from the base of the cake.
Use a pizza cutter or a sharp knife.
You can also buy a fondant cutter.
The hard part is done!
You're almost there...
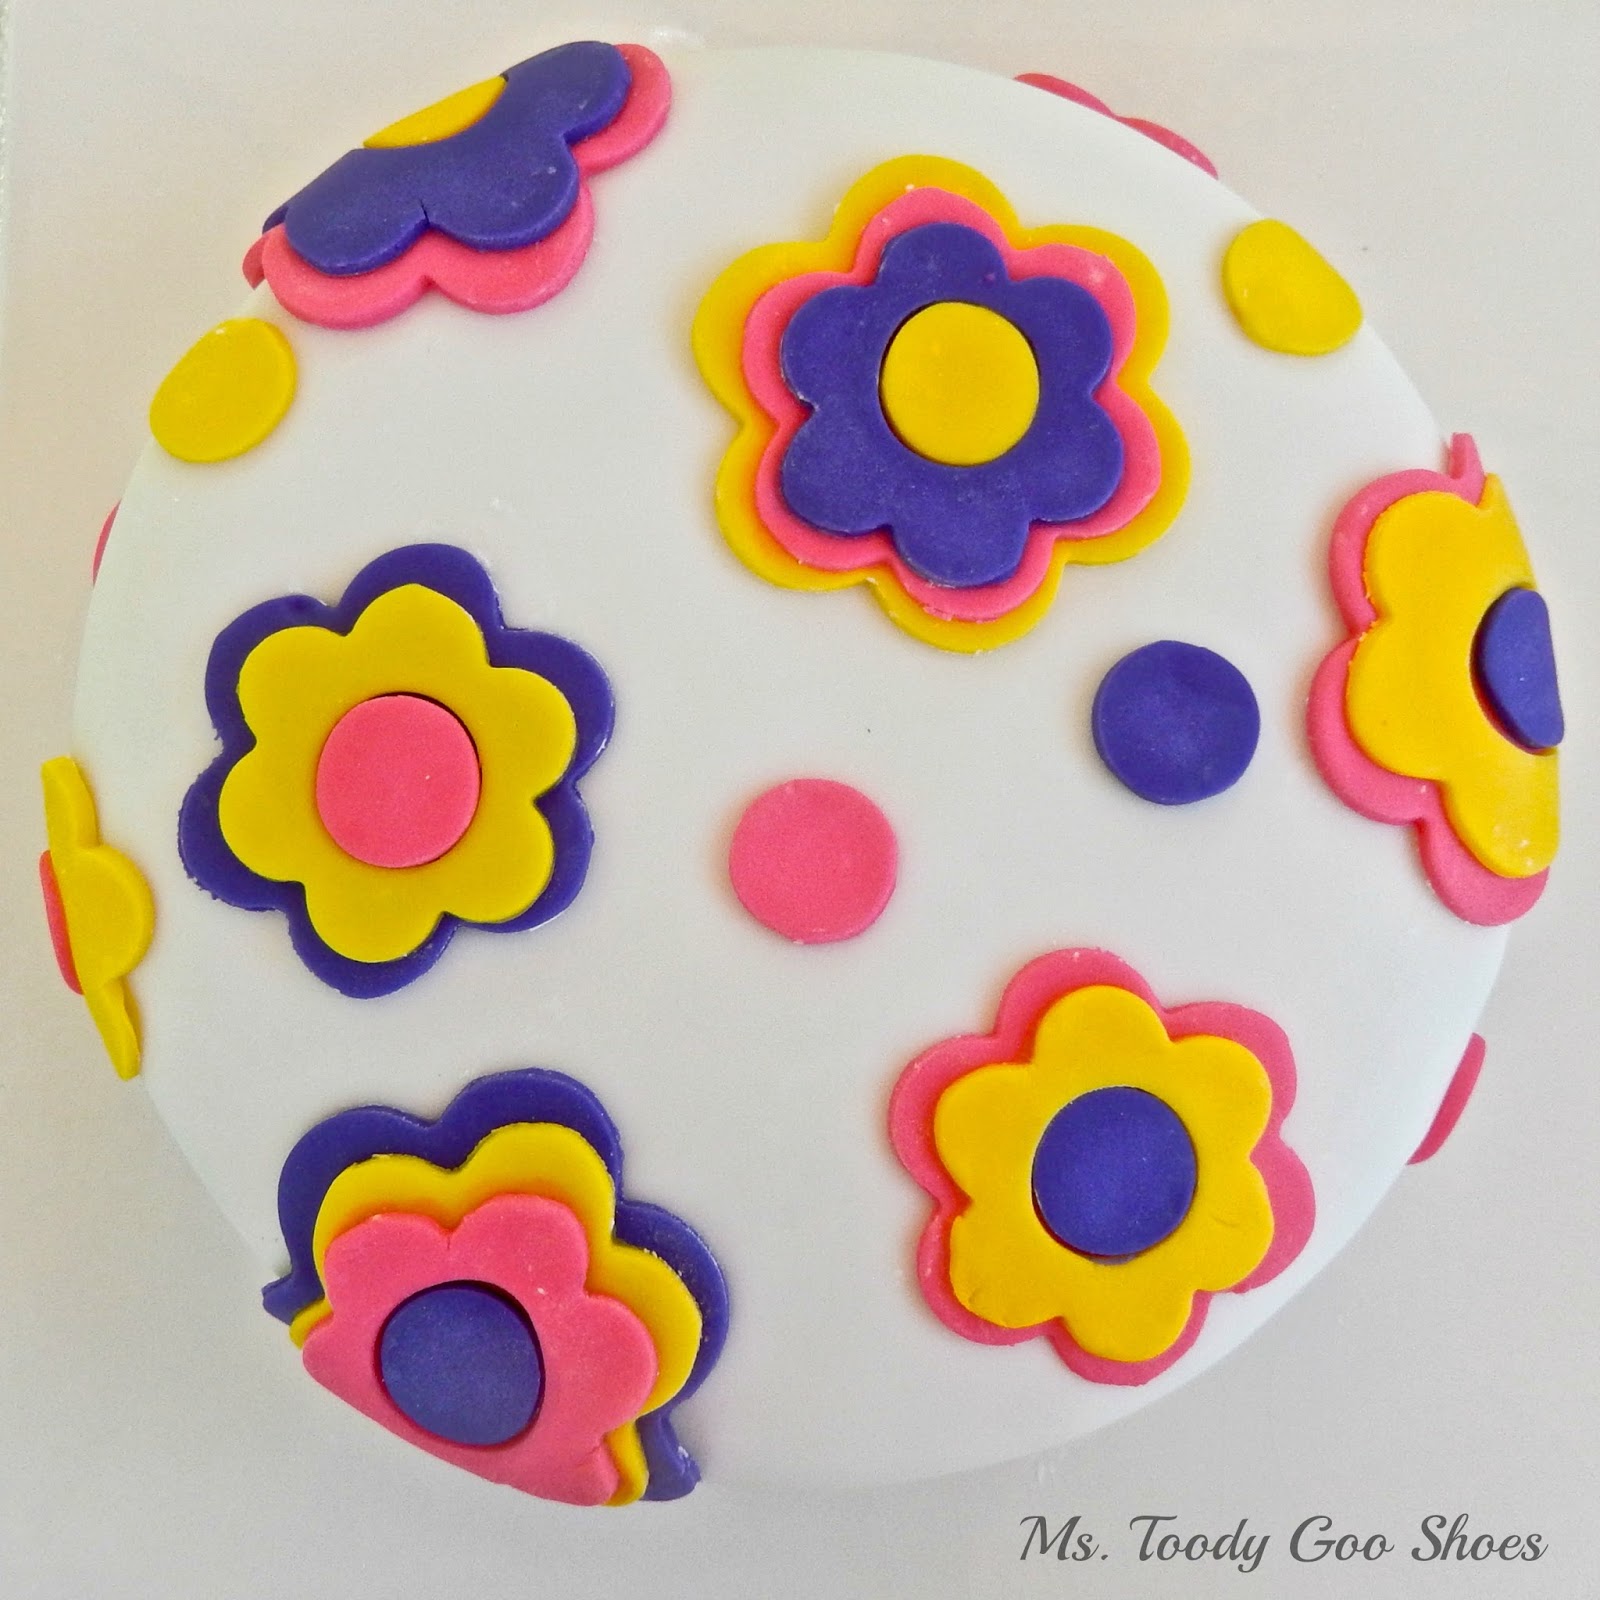
13. Cut out shapes using fondant cutters,
or cookie cutters.
It's just like Play-Doh for grown-ups!


14. Adhere the cutouts to the cake.
Wet the back of the cutouts with a little water,
using your finger or a pastry brush,
which will make them sticky.
Just place them where you want them.
Magic!
I was convinced that mine wouldn't stick to the cake,
but they did!

It's just like Play-Doh for grown-ups!
14. Adhere the cutouts to the cake.
Wet the back of the cutouts with a little water,
using your finger or a pastry brush,
which will make them sticky.
Just place them where you want them.
Magic!
I was convinced that mine wouldn't stick to the cake,
but they did!
My sister (Aunt Goo Shoes) was pretty impressed
with her birthday cake.

So was I, actually.
It was as easy as pie.
Or should I say,
It was a piece of cake!

with her birthday cake.
So was I, actually.
It was as easy as pie.
Or should I say,
It was a piece of cake!


You might also like:
 |
| Make A Fondant Beach Cake |


It came out fabulous! You've actually taken some of the fear away for me. Now the big question.....how does it all taste? Is it really sweet? It looks so thick :)
ReplyDeleteEasy peasy, AnnMarie! It just takes patience. It is very sweet. Let's put it this way - when I served it, all of the men ate it and liked it; all of the women ate the cake and left the fondant (including me!). To me, it's the presentation, like gift-wrapping a cake!
DeleteFirstly, happy birthday to your sister, she is so lucky to have such a fantastic cake!! Secondly, wow, oh wow Amy! I am going to bookmark your post to have a go and also have a go at making the cake sponge too. Looks delicious. Have a wonderful week xx
ReplyDeleteThe chocolate cake is SO good, Chel. You could serve it plain and enjoy it. And the fondant does make a statement!
DeleteYour cake turned out beautiful! I love the bright colors and flowers. Thanks for showing how to do it. I've never used fondant before.
ReplyDeleteThank you, Kelly! It's definitely not a hard thing to do, it just takes some time and patience.
DeleteI would have never guessed that was your first time working with fondant. Awesome job! When I took my first fondant class, it was to make a zebra-striped purse cake with a clasp and handle. Looking back, I probably should have started with something simpler. I haven't quite decided what I think of fondant. It's pretty, but I really don't like the taste at all. I recently made some Chocolate Clay which you use in the same way as fondant, but I like the taste much better.
ReplyDeleteWow, that zebra purse sounds complicated for a first attempt! I don't care for the taste - too sweet for me. I'd be interested in learning more about the chocolate clay.
DeleteWow that came out so cute! I've never tried fondant- you make it look easy enough! I find it intriguing that you took a cake class on a cruise!
ReplyDeleteIt's definitely a lot easier than I thought, Liz. It takes some patience to do all the steps, but it's surely not difficult. Yeah, I had no idea, either, that I could take those kind of classes on a cruise, either!
DeleteI am so excited to see this post! I have wanted to try fondant for years but, as you stated, thought it would be too hard. I am so happy to see your step by step post. I was glued to it! Pinning to try. Thank you for the inspiration!
ReplyDeleteI'm so happy to have inspired you, Carie! Makes all this blogging worth it to hear that :) Let me know if you do try it!
DeleteYou can achieve a flat cake by wrapping a wet strip of old toweling around the cake pan and safety pinning it. I learned this years ago at a Wilton class. Judy M.
ReplyDeleteThat's an interesting tip! I definitely need to hone my cake-straightening skils!
DeleteLovely. Maybe your tutorial will help me overcome my fear of fondant...Great work!!!
ReplyDeletewww.keepingitrreal.blogspot.com.es
Now I can say there's nothing to be afraid of, Teresa! It just takes some time and patience.
DeleteThank you for pinning Claire! The fondant really isn't hard, it just takes some patience. Yeah, I even managed to impress my sister!
ReplyDeleteThis is going to be so much fun for a kid's birthday, especially if the kid gets to participate. Can't wait to try it with my 7 year old. Pinned! Also intrigued by the cupcake/cake recipe. It looks so easy, and I am sure it is super moist and fluffy because of the buttermilk. A quick question: does it have to be buttercream for the dirty icing, or can I use, say, cream cheese based frosting? Thanks, Amy!
ReplyDeleteYour 7-year old will love it! It's amazing that something that I was afraid to try, is easy enough for kids to do (well, part of it anyway). I would think that you could use cream cheese based frosting. You need to be able to spread it easily, and make a very thin coating. If it's not too thick, it should work. Enjoy!
DeleteWhat a great cake for your sister to celebrate her birthday!! I bet she loved it. You really did a great job with the fondant it looks professional.
ReplyDeleteBlessings, Catherine
I thought it would be difficult, Catherine, but it wasn't! Just takes patience, but it's easy!
DeleteMy God your talented Amy - how beautiful !!!
ReplyDeletexox
I swear, it was easy peasy, Suzan!
DeleteGreat tips! I've always wanted to try working with fondant, too ... you make it look easy! :)
ReplyDelete